Soup, especially puréed, is one of few dishes I can pretty much rely on my toddler to eat. He loves it - almost regardless of what goes in it, as long as it's not too spicy. And as long as he can't see it, I guess. We, his parents, are however not huge soup fans. His dad often complains that it's not filling, and I often find it plain and boring. But since Titus loves soup, I keep an eye out for interesting recipes and this one caught my eye at Ann-Louise's Swedish blog: Lilla Matderivén. Carrots are always good, and with the textural addition of cooked cashews and the zippiness of feta cheese... yeah. Good. Very.
I added a handful of lentils to pack some extra protein in there, and omitted fresh thyme since I didn't have any. I also added some toasted cashews to serve on top, for more crunch. Next time, I'll add some fresh cilantro on top, too. (Titus won't touch any toppings, by the way.)
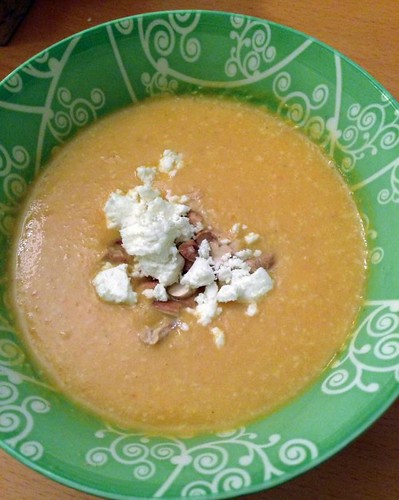
Carrot Soup with Cashews & Feta
serves 4
3 shalotts (or 1 small onion), diced
1 tbsp neutral oil
700 g carrots, sliced
75 ml cashew nuts, raw (a large handful)
75 ml red lentils
1 litre vegetable stock
150 g feta cheese, divided
Handful of cashew nuts, toasted and coarsely chopped
Fry the shalotts (or onion) in the oil, on medium heat. When it looks transclucent, add carrots, cashews and lentils. After a few minutes, add the vegetable stock.
Turn the heat up to high and bring to a boil. Then, cover with a lid, lower the heat and let it simmer on low heat for about 20 minutes. Check to make sure the carrots are soft. Crumble in half of the feta (reserve the other half for serving) and then use an immersion blender to purée the soup until very smooth.
Serve with the reserved feta, and some toasted cashews.